Object of game: throw lance through golden hoop
How to play: saddle up your horse, grab a lance, charge at target and toss lance through
Bystanders: cheer on their fellow knights with friendly bugle calls
Reward: bugle, chocolate silver coins, and king finger puppets

What really happened... we had to play this indoors because it was snowing, so our space was cramped, the pictures were lousy, and the noise from the horns was really loud. However, I'd do it all over again! We're still playing the "joust" game a month after our party.
BUGLES

Materials needed: 1) cardboard tube (paper towel or wrapping paper), 2) top third of a 1 liter pop bottle, 3) handle from 1 gallon milk jug, 4) gray poster paint, 5) golden spray paint, 6) hot glue gun. (Note that most of these materials were scavenged from my neighbor's recycling bins. Crazy lady!)
Although I had the parts painted in plenty of time before the party, I put off assembling them until the night before because the handles were the tricky part. I ended up using a hot pad to hold the handle to the tube while the hot glue dried. I would have added a bead of gold glitter glue or fabric paint around the seams to make them prettier. However, they sufficed for the job!
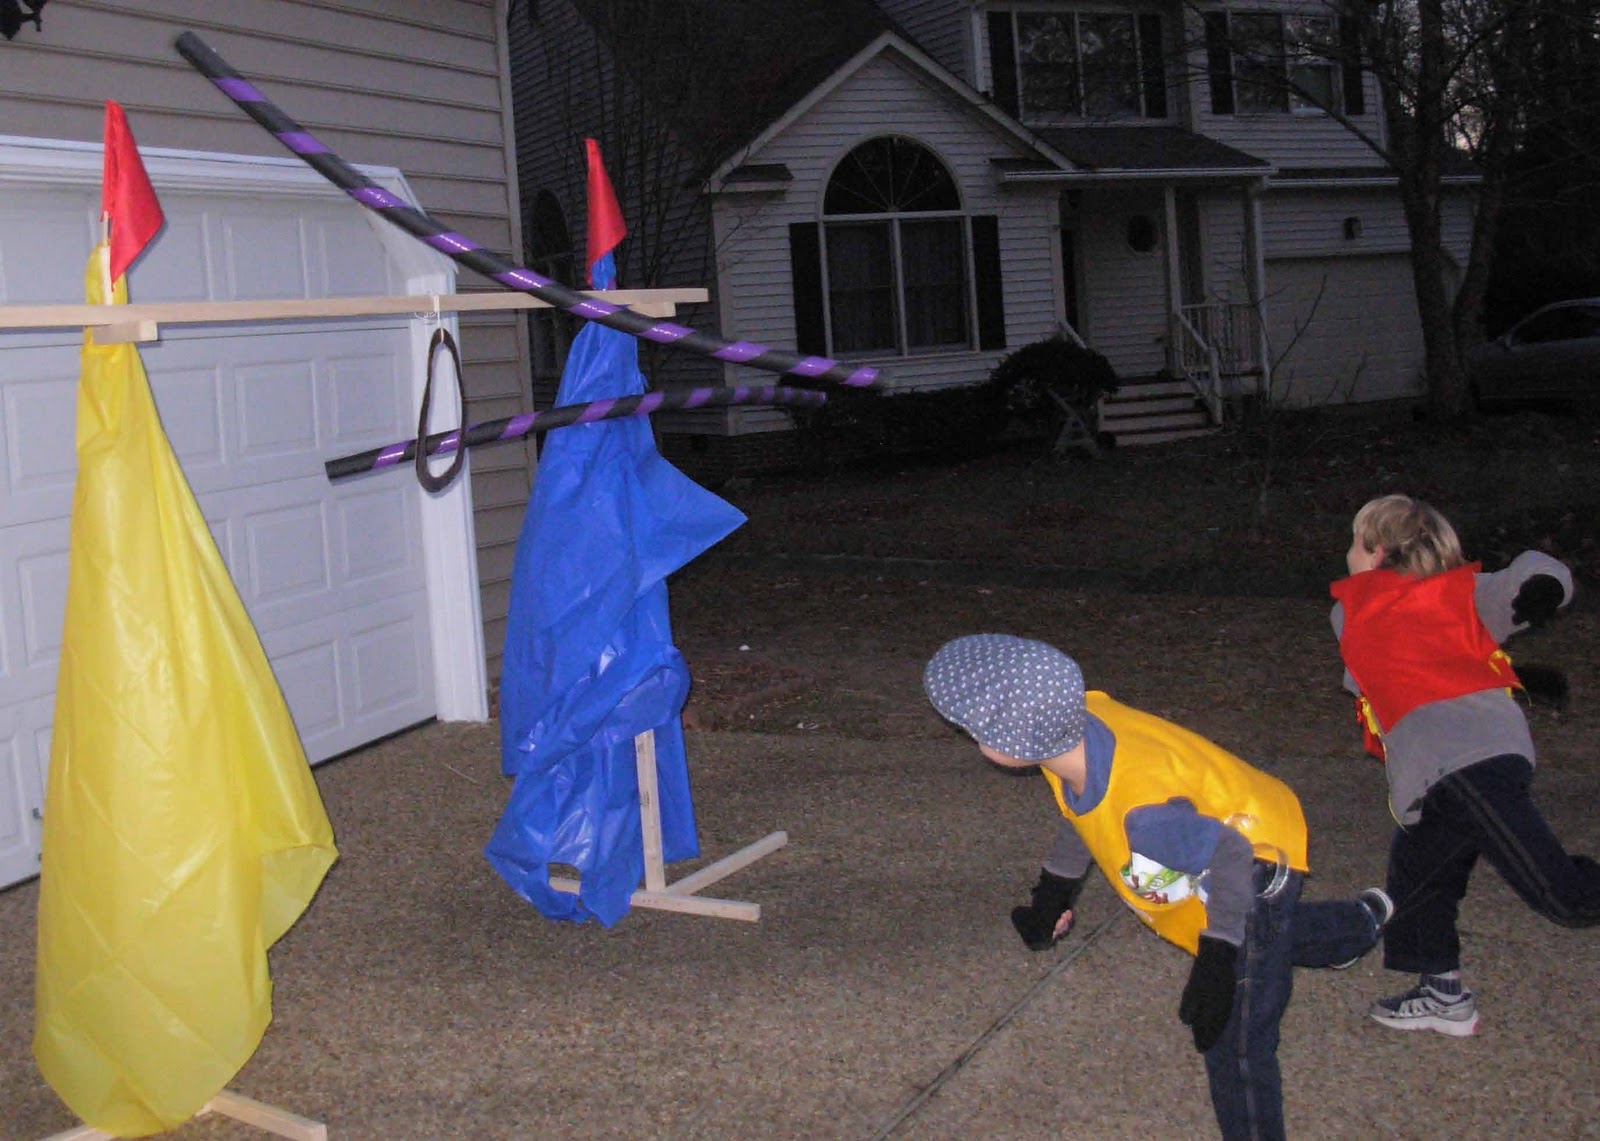
JOUST TARGET

My plan was to make this with cardboard wardrobe moving boxes so a kid could go inside each end and blow their bugles out the windows. I was going to decorate each box with paint and plastic table cloth to look like a little tent. However, I couldn't find any used boxes. The 2"x2 " lumber pieces were less expensive than new boxes! In the end, the wood frame pieces are easier to disassemble, store, and reuse (for play then house projects!) so I'm glad it worked out the way it did.
Materials needed: four 8'x2"x2" lumber pieces, a large cardboard square, flag material, two 12" dowel pieces (any smallish diameter), two plastic table cloths, string, gold paint
For the frame, we sawed a tall (69") pole from each of 2 lumber pieces. This left 2 pieces of about 27" that we would use for support. From a third piece of lumber, we sawed two more 27" support pieces so we would have a total of 4, two for each pole. We also sawed two 8" pieces for holding the crossbar at the top of each pole. That left another 26" piece to spare. The last 8' piece was the crossbar from which we would hang the target.

To assemble each pole, we arranged the support pieces into a T shape and fitted them together with screws on all sides until they were sturdy (see photo). No wood pieces stick out on one side to minimize trip hazards... because that's where the kids would be running through with their lances, their eyeballs on the target and not their feet!
We screwed the small 8" piece to each pole about 7" from the top. The crossbar rests on top of these.
Lastly, we drilled a hole wide enough to fit a small (12") dowel in the top of each pole to add a flag for decoration. The flags were easily sewn from a small fabric piece in the clearance remnant section of our local fabric store. I cut the rectangular piece in two, hemmed all the sides, folded over the vertical edge to make a pocket for the dowel, and wha-la, two triangle flags (10" hemmed vertically, 15" hemmed to point). :)
The poles were decorated with a plastic table cloth. I centered the cloth over the top of the pole, wrapped the royal purple duct tape around, then poked the dowel through. I was going to add some golden and red streamers but ran out of time.
For the target, I traced large circular household items on the cardboard to make a nicely circular target (15" diameter) and then painted each side gold. The target attached to the crossbar with string. I adjusted the height of the target based on the height of the knight! If I did this again, I'd either use a sturdier material or glue two rings together for double durability. The target held fine for the party but quickly drooped in week later play.
The lances were made from a pipe foam insulation tube striped in royal purple duct tape. Pool noodles would be fine too, but I couldn't find any in January, not even at a thrift store! This worked out better though, as we will put them to their intended use when the boys are done with the game.
SOCK HORSE

For the stick horse and scooter horse, I fashioned sock horse heads from materials we had around the house: stuffing from an old pillow, old socks, felt pieces, googly eyes, and ribbon. I fitted the head over two dowels and duct-taped it on to the scooter. For the stick horse, I just duct-taped the head to a large dowel stick.
The kindergartners all chose to play the game with the stick horse, leaving the scooter to some of the 3rd graders.
It's almost embarrassing to post a picture of this horse-- but for those of you who are worried about the visual appeal of your humble projects, take a look at mine. The kids were all deliriously happy with the game despite the homely creations! Not a negative word was said!
good ideas, thanks
ReplyDelete